
Watch Loupe Magnification Guide: Which Power Do You Need
 12 min read
2,385 words
12 min read
2,385 words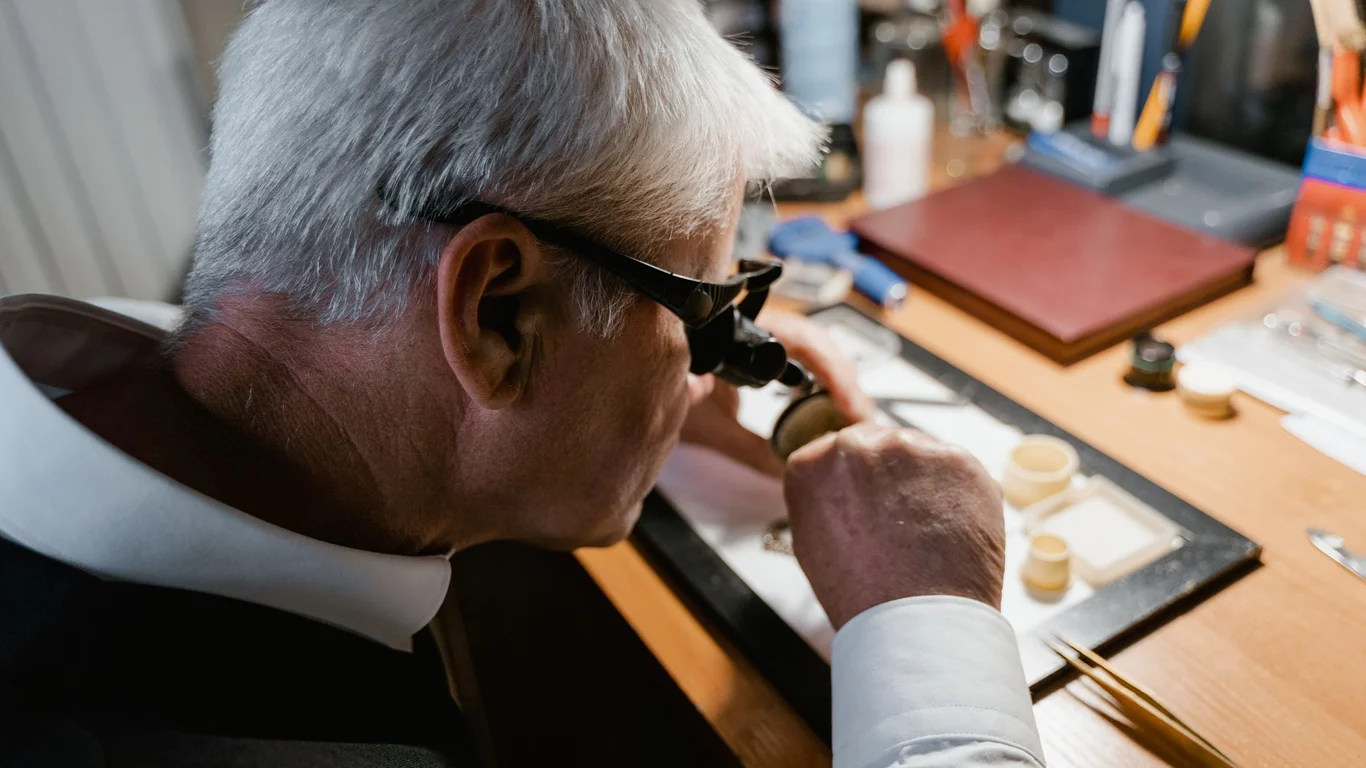
You’re Staring at a Page of Magnification Numbers, and It’s Not Clicking Yet
If you’ve just searched for a watch loupe and found yourself drowning in terms like “10x triplet,” “20x Hastings triplet,” and “eye relief,” you’re not alone. The numbers—5x, 10x, 15x, 20x—look like a simple scale, but they don’t tell you how close you’ll have to shove the lens to your watch, or whether you’ll actually be able to see the whole movement at once. This guide is built to fix that confusion. By the time you finish reading, you’ll know exactly which magnification fits the work you plan to do, and you won’t waste money on a loupe that’s either too weak to be useful or too strong to handle.
What the ‘x’ Number Actually Means for How Close You Need to Hold It
Let’s clear up the single most misunderstood number in the loupe world. The “x” rating—say, 10x—means the lens magnifies the object to appear ten times larger than it does to your naked eye at a standard viewing distance of 10 inches (250 mm). But here’s the catch: to get that full magnification, you have to place the lens at its specific focal length from the object. For a 10x loupe, that focal length is roughly one inch (25 mm). For a 20x loupe, it’s about half an inch (12 mm).
What does that mean in practice? A higher x rating forces you to hold the loupe closer to the watch. You will be working with your eye nearly touching the lens, and the lens nearly touching the part. That’s fine for inspecting a jewel pivot, but it’s miserable for scanning a whole dial for dust specks. Lower x ratings give you more working distance—you can hold the loupe farther from the watch and still see clearly.
If you wear glasses, check the eye relief (the distance your eye can be from the lens and still see the full field of view). Some high-power loupes have very short eye relief, making them awkward to use with frames. You might need a loupe that clips onto your eyeglass frame instead of a handheld one.
So the “x” number isn’t just a measure of power—it’s a direct trade-off between how big things look and how close you have to get. Keep that trade-off in mind as we walk through the ranges.
Low Power (2.5x–5x): General Inspection, Spotting Scratches, Reading Engravings
If your primary goal is checking a watch for visible condition—case scratches, dial patina, hand alignment, or reading the tiny serial number on a caseback—a low-power loupe is your best friend. At 2.5x to 5x, you get a wide field of view and a comfortable working distance of 4 to 8 inches. You can hold the loupe in one hand and the watch in the other without feeling like you’re performing microsurgery.
This range is also ideal for inspecting strap spring bars, checking that a crown screws down fully, or reading the fine print on a warranty card. You don’t need to see individual oil molecules; you need to see whether that scratch is through the coating or just on the surface. A 4x or 5x loupe will show you that clearly.
For reading engravings on casebacks or movement rotors, a 5x loupe is often the sweet spot. It’s strong enough to make the text legible but not so strong that you lose the context of where the text sits on the part.
Low-power loupes are also the most forgiving for beginners. They don’t require perfect lighting or a rock-steady hand. You can hold one while standing at a bench without a headband, and you’ll still get a useful view. If you’re building a first tool kit and aren’t sure you’ll do more than basic inspection, start here. You won’t feel like you underbought.
Mid Power (7x–10x): The Practical Sweet Spot for Most Hobbyist Tasks
This is where the majority of hobbyist watch work lives. At 7x to 10x magnification, you can see the details that matter for most movement tasks: the condition of screw slots, the alignment of regulator pins, the state of a balance staff pivot, and whether a jewel has a crack or a chip. You still have enough working distance (about 1 to 1.5 inches) to maneuver tweezers and a screwdriver without constantly bumping the lens.
If you’ve ever seen a watchmaker wearing a headband loupe and wondered what power they’re using, it’s almost always a 10x. It’s the standard for a reason. It reveals enough to catch problems without revealing so much that you see every microscopic dust mote and lose your mind trying to clean them all.
For the beginner buying their first loupe, a 10x is the single most versatile choice. You can inspect a movement, check a crown gasket, look at a hairspring for bent coils, and even do basic oiling with a 10x. It’s the “do it all” power, and it’s cheap enough that you can add a lower or higher power later without feeling like you wasted money on the first one.
A cheap 10x loupe with a plastic lens will have visible distortion at the edges and may show a blue or yellow tint. Spend the extra few dollars for a glass or acrylic triplet lens (three elements cemented together) from a known brand like BelOMO, Bausch & Lomb, or Optivisor. The image clarity difference is night and day.
If you’re debating between a 7x and a 10x, lean toward the 10x. The extra magnification is rarely too much for movement work, and you can always back the loupe away from your eye slightly to reduce the effective magnification if needed. You can’t get more magnification out of a 7x loupe.
High Power (15x–20x+): Fine Parts Work, Hairspring/Jewel Inspection, Harder to Use
At 15x and above, you’re entering the territory of serious detail work. This is the power you reach for when you need to see whether a hairspring is truly flat, whether a jewel pivot has a hairline fracture, or whether a screw thread is damaged. It’s also the power you use to inspect the tip of a screwdriver blade or the edge of a tweezers for burrs.
But high power comes with real penalties. The working distance shrinks to less than an inch, meaning your face is essentially pressed against the work. The field of view narrows dramatically—at 20x, you might see only a single jewel and the surrounding bridge. That makes it hard to orient yourself. You’ll find yourself constantly lifting the loupe to see where you are, then lowering it to see the detail.
Lighting becomes critical at high power. The lens itself blocks ambient light, so you need a strong, focused light source (an LED ring light or a gooseneck lamp) aimed directly at the work area. Without good light, a 20x loupe shows you a dim, fuzzy image that’s worse than a 10x with decent light.
Do not buy a 20x or 30x loupe as your first and only loupe. The learning curve is steep, and you will get frustrated trying to do basic tasks like inspecting a dial or removing a caseback. High-power loupes are specialized tools, not general-purpose ones. Get a 10x first, then add a 20x when you start working on hairsprings or doing pivot polishing.
For most hobbyists, a 15x is the highest practical power you’ll use regularly. It gives you enough detail for fine work without the extreme working distance and field-of-view restrictions of a 20x. If you buy a set of loupes (common in kits), you’ll likely use the 10x 80% of the time and the 15x the other 20%.
Eyeglass Loupe vs Headband/Visor Style: Comfort and Hands-Free Tradeoffs
Once you’ve settled on a magnification range, the next question is how you want to wear the loupe. You have two main options: an eyeglass-mounted loupe that clips onto your glasses frame (or comes as a single lens on a headband), or a full headband visor system like the Optivisor.
Eyeglass loupes are compact, cheap, and easy to flip up out of the way. They’re great for quick inspections where you need to look at something, then look away. The downside is that they put all the weight on one side of your glasses, which can be uncomfortable after 30 minutes. They also give you only one eye magnified, which can cause eye strain during long sessions because your brain is trying to fuse two different image sizes.
Headband visors solve the comfort and binocular vision problems. A system like the Optivisor or Donegan DA-5 puts a lens in front of both eyes, giving you depth perception that a single loupe can’t match. The headband distributes the weight evenly, and you can wear it for hours without neck pain. Most visors also allow you to flip the lens plate up when you need to look at something unmagnified.
The tradeoff is that visors are bulkier and more expensive. A good Optivisor costs around $50 to $80, while a basic eyeglass loupe is $10 to $20. If you’re doing movement work that requires both hands (and most serious work does), the visor is worth the investment. If you’re only doing occasional case and dial inspections, the eyeglass loupe is fine.
If you go the headband route, buy a spare lens plate in a higher or lower power. Most visor systems let you swap plates in seconds, giving you a 4x for dial work and a 10x for movement work without buying a second headband.
There’s also a middle ground: a headband that holds a single loupe in front of one eye, leaving the other eye uncovered. These are less common but useful if you want the hands-free benefit without the cost of a full binocular visor. They work best with a 5x or 7x loupe where the single-eye strain is less noticeable.
Comparison Table: Magnification vs Best Use Case vs Learning Curve
The table below sums up everything we’ve covered. Use it as a quick reference when you’re comparing products online or deciding which loupe to pull out of your drawer for a specific job.
| Magnification | Best Use Case | Working Distance | Learning Curve |
|---|---|---|---|
| 2.5x – 5x | Case inspection, dial defects, engraving reading, spring bar checks | 4 – 8 inches | Very low – pick up and use immediately |
| 7x – 10x | Movement inspection, screw condition, jewel checking, basic oiling | 1 – 1.5 inches | Low – slightly more care with focus and lighting |
| 15x – 20x | Hairspring flatness, pivot condition, jewel cracks, tool burr inspection | 0.5 – 1 inch | Moderate – requires good lighting and steady hands |
| 30x+ | Micro-polishing, cap jewel inspection, watch paper reading (rare) | Less than 0.5 inch | High – very narrow field, hard to keep stable |
Notice the pattern: as magnification goes up, working distance drops, and the learning curve climbs. The 10x row is the only one that hits a sweet spot of moderate working distance and low learning curve while still being useful for real movement work. That’s why it’s the default recommendation for anyone building a first tool kit.
Putting It All Together: Picking Your First Loupe
If you’re starting from zero, here’s the practical path. Buy a single 10x loupe with a glass or acrylic triplet lens. Get it in a headband visor if you plan to do movement work, or as a foldable handheld loupe if you’re mostly inspecting cases and dials. Use it for three months. During that time, you’ll discover whether you need more magnification (for fine pivot work) or less (for dial reading). Then add a second loupe in the direction you need.
Don’t buy a set of six loupes with different powers. Most of them will be cheap plastic singlets with terrible optics, and you’ll end up only using one or two. Spend your money on one good loupe and one good light source instead. A 10x triplet with a decent LED lamp will outperform a drawer full of $5 loupes every time.
Remember that the loupe is a tool, not a magic wand. No amount of magnification will make up for shaky hands, poor lighting, or lack of practice. Start with the power that lets you see enough to do the work comfortably, and let your skill level—and your specific watch projects—guide you to higher power later.
Frequently Asked Questions
What magnification do most professional watchmakers actually use day to day?
The vast majority of professional watchmakers reach for a 10x loupe as their daily driver. It offers the sweet spot between enough detail to inspect pivot condition and jewel wear without being so strong that hand shake or depth of field becomes a constant frustration. Some will keep a 4x handy for dial work and a 20x on the bench for oiling and hairspring adjustments, but 10x is the workhorse power you’ll see in most service videos and repair bays.
Is a higher magnification always better?
Not at all. Higher magnification means a narrower field of view, shallower depth of field, and far less working distance between your eye and the part. A 30x or 40x loupe can make a simple screw look like a cratered landscape, but you’ll struggle to keep the entire part in focus while your hands hover, and any movement is magnified into a jittery earthquake. The best power is the lowest one that still shows you what you need to see clearly.
Can I get by with my phone camera zoom instead of a real loupe?
You can use your phone camera as a quick diagnostic tool to spot a loose screw or read a tiny caseback engraving, but it’s a poor substitute for a real loupe during actual work. The phone forces you to hold it steady with one hand while trying to manipulate tweezers with the other, and the digital zoom introduces lag and distortion that can mislead you about a part’s true condition. A proper loupe lets you use both hands freely and gives you a direct, distortion-free view of the work.
🛒 Shop Compatible Parts
Prices and stock verified daily by our affiliate partners. As an affiliate, WatchPartsFit may earn a commission on qualifying purchases at no extra cost to you.
Check Compatibility First →
watchpartsfit
WatchPartsFit editor covering mechanical watch strap compatibility, movement repair, and part-replacement guides.