
Watch Tool Kit Storage And Organization: Organizing a Watch Repair Tool Kit So Nothing Gets Lost
 14 min read
2,638 words
14 min read
2,638 words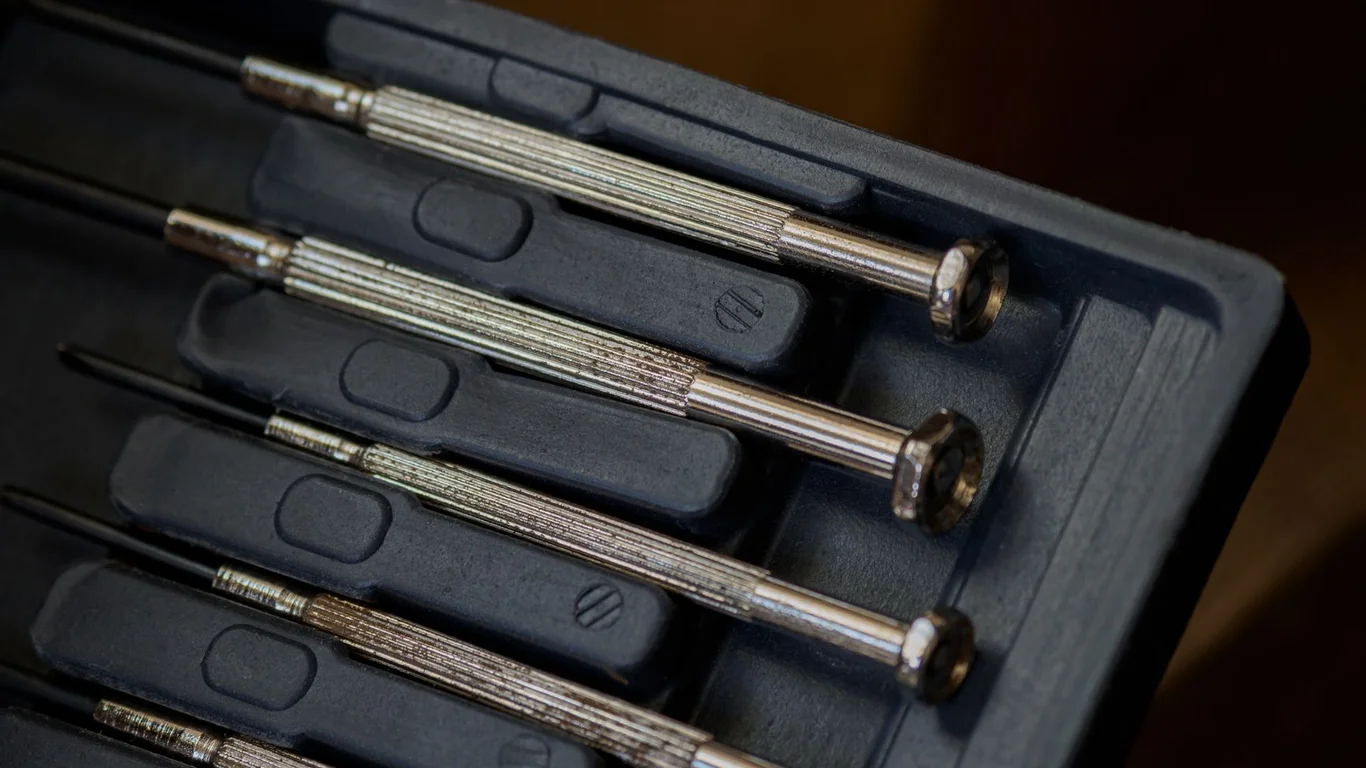
You’re three screws deep into a movement swap, and you look away for exactly one second. When you look back, the screw is gone. Not on the mat, not in the tray, not on the floor. It has simply ceased to exist. If that scenario sounds painfully familiar, you’re in good company. Every hobbyist who has ever worked on a mechanical watch has lost at least one tiny part — and most of us have lost several. The problem isn’t your eyesight or your patience; it’s that your current storage and organization system wasn’t built for parts this small. Let’s fix that.
This guide is for the person who already owns the tools but is tired of losing the parts. We’re going to walk through the specific ways tiny watch components escape, then build a practical storage and workflow system that keeps them where they belong. By the end, you’ll have a setup that doesn’t just store your tools — it protects your project from disaster.
Why watch parts are uniquely easy to lose
Before you can solve the problem, you need to understand why watch parts are so slippery — literally. A typical movement screw is about 1.2 mm long and weighs less than a grain of rice. That size creates three distinct escape behaviors that a larger screw never has.
Static electricity is your enemy. Tiny metal parts can cling to your sleeve, your desk mat, or even your own arm hair. You think you set the part down, but static grabbed it and launched it somewhere you won’t find until next week. A dry winter workshop makes this ten times worse.
Rolling on smooth surfaces. A balance screw doesn’t just fall; it rolls. On a polished wooden desk or a glass top, that screw can travel six inches from where you dropped it. By the time you react, it’s under a stack of papers or inside a drawer crack. The smaller the part, the farther it travels before stopping.
They disappear into fabric and carpet. Drop a screw on a carpeted floor and you might as well have dropped it into the ocean. The same goes for a fuzzy sweater or a towel you’ve laid down as a work surface. Watch parts are small enough to nestle between carpet fibers and never be seen again.
A single human hair is roughly 0.05 mm thick — about the same diameter as a watch pivot. That means your own loose hair on the workbench can look like a spring or a part. Keep your workspace clean and your hair tied back if it’s long.
Once you understand these behaviors, you can design your storage and workflow to counter each one. Static gets grounded or blocked. Rolling gets contained. Fabric and carpet get avoided entirely. Let’s look at the tools that make that possible.
Parts trays and dishes — keeping disassembly order visible
The most common mistake beginners make is using a single dish for all parts. They dump every screw, spring, and gear into one ceramic bowl and assume they’ll remember where each one came from. They won’t. Fifteen minutes later, they’re holding up three identical-looking screws and wondering which one went to the keyless works.
A proper parts tray system does two things: it separates parts by their location in the movement, and it keeps them visible so you can see at a glance what’s still missing. Here’s what actually works in practice.
Multi-compartment trays
Look for a tray with at least six to twelve individual wells. Each well gets one group of parts from one stage of disassembly. For example, the automatic winding bridge screws go in well 1, the rotor screws in well 2, the mainspring barrel parts in well 3, and so on. Label the tray with a piece of tape or a dry-erase marker if you’re doing a complex movement.
The best trays have a textured or matte bottom surface. Glossy plastic lets parts slide around and jump between compartments when you bump the tray. A matte finish or a rubberized insert holds each part where you put it.
Stackable dishes for large projects
If you’re servicing a chronograph or a calendar movement with fifty-plus parts, a single tray won’t cut it. Stackable dishes let you work layer by layer. You fill one dish with the parts from the top plate, set it aside, and start the next layer in a fresh dish. The stack keeps the order obvious: dish 1 is the first thing you removed, dish 2 is the next, and so on.
When you place a part in a tray well, orient it the same way it sits in the movement. A screw with the head up, a spring with the coil direction visible — this visual cue saves you from having to re-examine every part to remember which side faces up during reassembly.
Magnetic vs. non-magnetic options — a quick breakdown
This is where opinions diverge, and the right choice depends on what you’re working on. Let’s compare the two approaches side by side.
| Feature | Magnetic tray or mat | Non-magnetic tray or dish |
|---|---|---|
| Part retention | Excellent — parts stay put even if bumped | Good — but parts can slide or roll out |
| Risk to movement parts | Can magnetize screws, springs, and balance wheels | Zero magnetization risk |
| Best use case | Holding tools (screwdrivers, tweezers) during work | Holding movement parts during disassembly |
| Risk of losing tiny parts | Low — parts stick firmly to the mat | Higher — parts can roll off if you’re careless |
| Post-work cleanup needed | You must demagnetize all parts before reassembly | None — just pick up and place |
The takeaway: use a magnetic mat for your tools, not your parts. Your screwdrivers and tweezers won’t care about magnetism. Your hairspring absolutely will.
Non-magnetic vs magnetic surfaces — when magnetism helps and when it risks magnetizing parts you don’t want magnetized
This deserves its own deep dive because it’s the single most misunderstood topic in watch part storage. A magnetic mat looks like a miracle solution: you drop a screw and it sticks right where it lands. No rolling, no static, no disappearing. So why doesn’t every hobbyist use one for everything?
Because magnetism doesn’t discriminate. A magnetic mat will magnetize every ferrous part that sits on it for more than a few minutes. That includes your mainspring, your balance spring, your escape wheel, and your pallet fork. Magnetize those parts and your watch will run wildly fast — sometimes gaining hours per day — until you demagnetize everything.
Here’s the practical rule: Only use magnetic surfaces for non-movement items. Your screwdrivers, tweezers, hand removers, and case screws are fine on a magnetic mat. Your movement screws, springs, and gears should never touch one. If you absolutely must use a magnetic tray for tiny parts during disassembly, limit contact time to under a minute and demagnetize every part before reassembly.
Never place a balance assembly (the balance wheel and hairspring together) on a magnetic mat. Even a brief exposure can magnetize the hairspring, causing it to stick to itself in coils. This is not a “demagnetize and it’s fine” situation — severe magnetism can permanently deform the spring.
For the vast majority of hobbyists, the safest approach is a non-magnetic parts tray for all movement components and a separate magnetic mat for tools only. That separation keeps your parts safe and your tools conveniently stuck in place.
Tool rolls and cases for the tools themselves
Once you’ve solved the parts storage problem, turn your attention to the tools. A pile of loose screwdrivers and tweezers on your bench is a disaster waiting to happen. You reach for a size 0.8 screwdriver, knock a tray of parts, and you’re back to square one. Tool rolls and cases prevent that by giving every tool a dedicated home.
A watch tool roll is a fabric or leather roll with individual pockets for each tool. You roll it up when you’re done and unroll it on your bench when you start. The advantages are obvious: tools don’t slide around, you can see at a glance if something is missing, and the roll protects the tips from getting banged against each other.
Look for a roll with at least six to eight slots. You’ll want space for your main screwdriver set, a pair of tweezers, a hand remover, a case opener, and maybe a loupe. Some rolls have a zippered compartment for small spare parts or oilers, which is a nice bonus.
A hard case is better if you travel with your tools or work in a shared space. A pelican-style case with custom foam inserts keeps everything immobile. The downside is that a hard case takes up more bench space and doesn’t ventilate well — moisture can build up inside if you close it while tools are still damp from cleaning.
If you use a tool roll, store it flat or hanging, never rolled tightly. Constant rolling pressure can bend screwdriver shafts over time, especially with cheap tools. A bent shaft means a wobbly tip, which means stripped screw heads.
Whichever you choose, the rule is simple: every tool has a home, and every home is labeled or visually distinct so you don’t have to hunt. The five seconds you spend putting a screwdriver back in its slot is nothing compared to the five minutes you’ll waste digging through a pile to find it.
A simple workflow habit that prevents most lost-part disasters
You can have the best storage system in the world, but if your workflow is chaotic, you’ll still lose parts. There’s one habit that eliminates ninety percent of lost-part disasters: one component out at a time.
Here’s how it works. When you disassemble a movement, you don’t remove everything at once and spread it across your bench. Instead, you work in stages. Remove the rotor and its screws. Place them immediately in your parts tray in the well labeled “rotor.” Close the movement. Remove the automatic bridge and its screws. Place them in the next well. Close the movement. Repeat for every layer.
This habit does two things. First, it prevents the overwhelming mess of fifty parts scattered across your bench. Second, it forces you to handle each part only when you’re ready to store it. You never set a screw down “temporarily” on the mat next to your tray — because temporary always becomes permanent until you knock it off.
The same rule applies during reassembly. Take one part out of storage at a time. Install it. Then take the next part out. Never dump a whole tray of parts onto your bench and try to sort them by memory. Your memory will fail you, and your parts will end up in the wrong places.
Professional watchmakers often use a “shadow board” — a board with outlines drawn for each part or tool. If a part isn’t in its outline, you know immediately that it’s missing. You can make a simple version by tracing your parts tray wells on a piece of paper and checking it after each step.
This one habit — one component out at a time — is the difference between a clean, controlled service and a frantic search under the desk for a screw that rolled into the abyss. It takes discipline for the first few projects, but after that it becomes automatic.
What to do if you’ve already lost a critical tiny part
So you ignored everything above, or you’re reading this after the fact, and you’ve already lost a screw or a spring. Don’t panic. There are several things you can try before you give up and order a replacement.
First, search methodically. Don’t just glance around. Get a bright flashlight and shine it across the floor at a low angle. Shadows from tiny parts show up much better with side lighting. Check under your workbench, inside your chair casters, and along the baseboards. If you dropped it on carpet, run a vacuum cleaner hose over the area with a nylon stocking stretched over the end — the part will stick to the stocking without getting sucked into the bag.
Second, check your own clothes. Static can make a part cling to your shirt sleeve, your pant leg, or even your shoe. Run your hands over your clothing slowly. If you were wearing a hoodie or a sweater, check the cuffs and pockets carefully.
Third, use a magnet carefully. If you’re sure the part is ferrous (screws, springs, most movement components), sweep a strong magnet wrapped in a thin cloth over the search area. The cloth prevents the magnet from scratching the part. But remember: once you find it, you’ll need to demagnetize it before using it in the movement.
Never use a magnet near a watch that still has its balance or hairspring installed. Even a brief magnetic field can ruin the timing. If you’re searching for a lost part near an assembled watch, remove the watch from the area first.
Fourth, accept the loss and order a replacement. Sometimes the part is gone for good. That’s frustrating, but it’s part of the learning curve. Most movement parts are available from supply houses like Cousins UK, Esslinger, or Jules Borel for a few dollars. Buy two — one to use and one to lose next time. Keep a small stock of common screws and springs for the movements you work on most.
The real lesson here is that prevention is cheaper and faster than recovery. A $10 parts tray and a $15 tool roll will save you more time and frustration than any amount of post-loss searching. Invest in the system now, and you’ll never have to write this paragraph again.
Watch repair is a hobby of tiny victories and tiny defeats. The parts you work with are small enough to vanish without a trace, but they don’t have to. With the right storage, the right surfaces, and a deliberate workflow, you can keep every screw, spring, and gear where it belongs — in your movement, not on your floor. Set up your system before your next project, and give yourself the gift of a clean bench and a clear head.
Frequently Asked Questions
Is it safe to use a magnetic tray for holding watch parts during a repair?
No, you should avoid magnetic trays for loose watch parts, especially balance springs and hairsprings. A magnetic field can magnetize these delicate components, causing timing errors or erratic behavior in the finished movement. Stick to non-magnetic parts trays—ceramic, plastic, or wood—and save the magnetic tray for screws or tools that won’t be affected.
What kind of work surface is best for preventing small parts from disappearing?
A white, non-slip mat is your best bet—it provides high contrast against tiny steel screws and springs while keeping them from bouncing or rolling away. Avoid dark, glossy, or cluttered surfaces where a loose part can blend in or skitter off the edge. Many watchmakers use a silicone or rubber bench mat with a raised lip to catch any drops before they hit the floor.
What should I do if I lose a tiny screw or spring during a watch repair?
First, stop working immediately and sweep the floor with a flashlight and magnet—many lost parts end up within a three-foot radius of your chair. If that fails, check your sleeves, cuffs, and the folds of your bench mat before accepting the loss. As a last resort, order a replacement from a supply house like Cousins UK or Esslinger, and buy two so you have a spare for next time.
🛒 Shop Compatible Parts
Prices and stock verified daily by our affiliate partners. As an affiliate, WatchPartsFit may earn a commission on qualifying purchases at no extra cost to you.
Check Compatibility First →
watchpartsfit
WatchPartsFit editor covering mechanical watch strap compatibility, movement repair, and part-replacement guides.